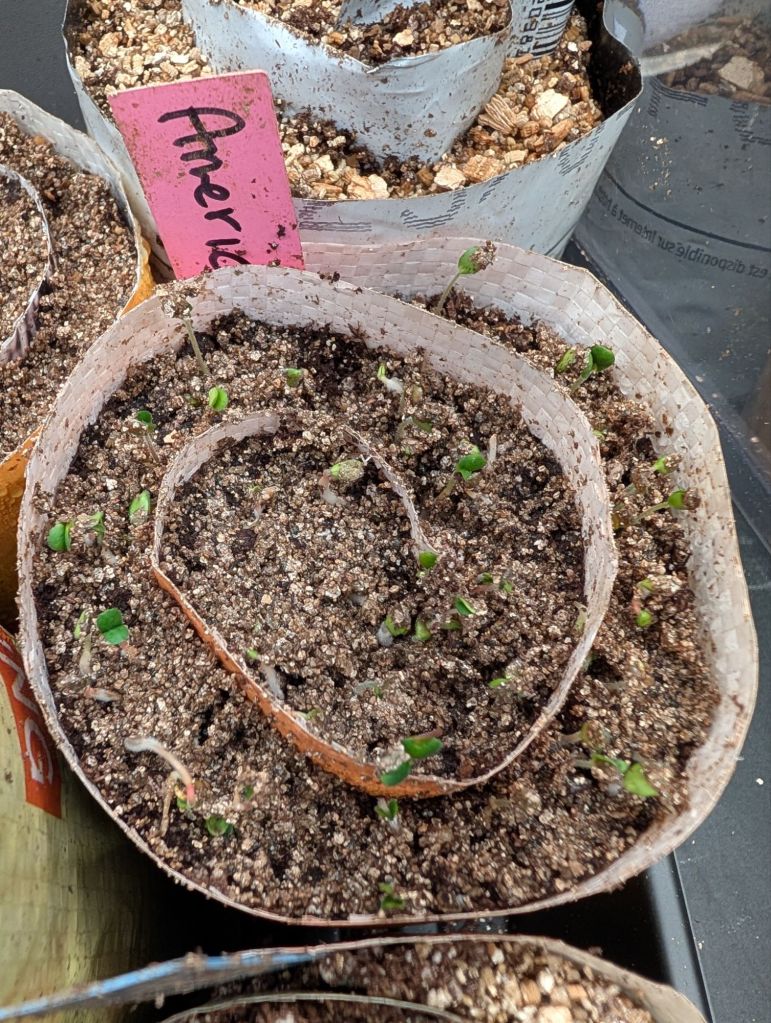
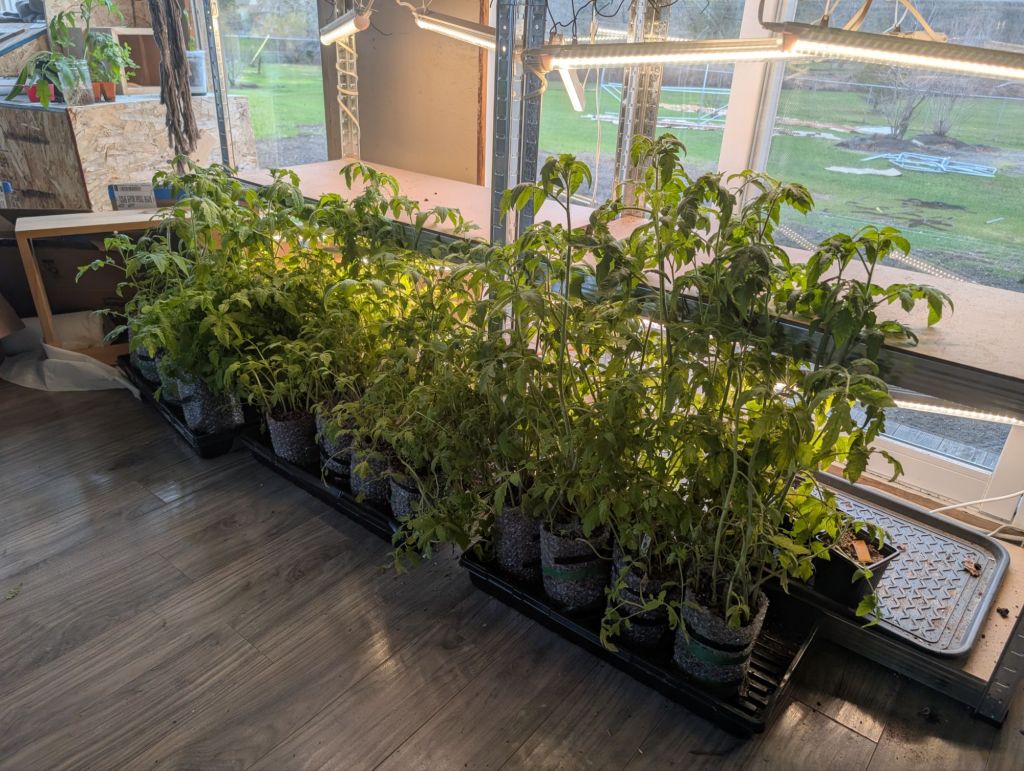
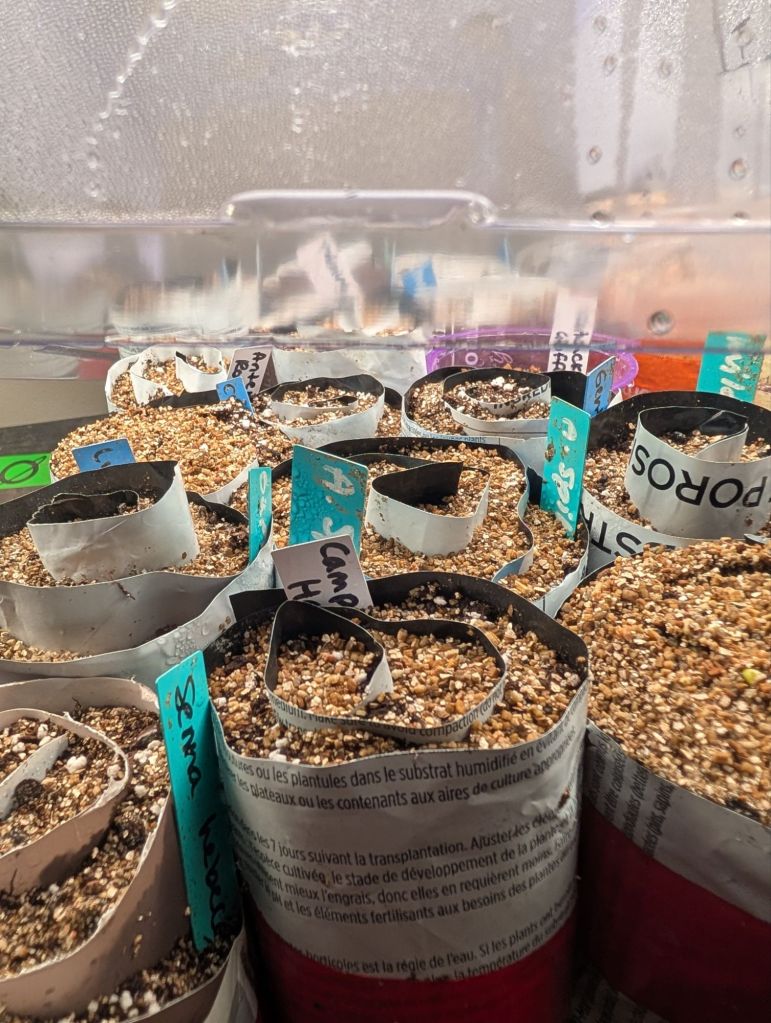
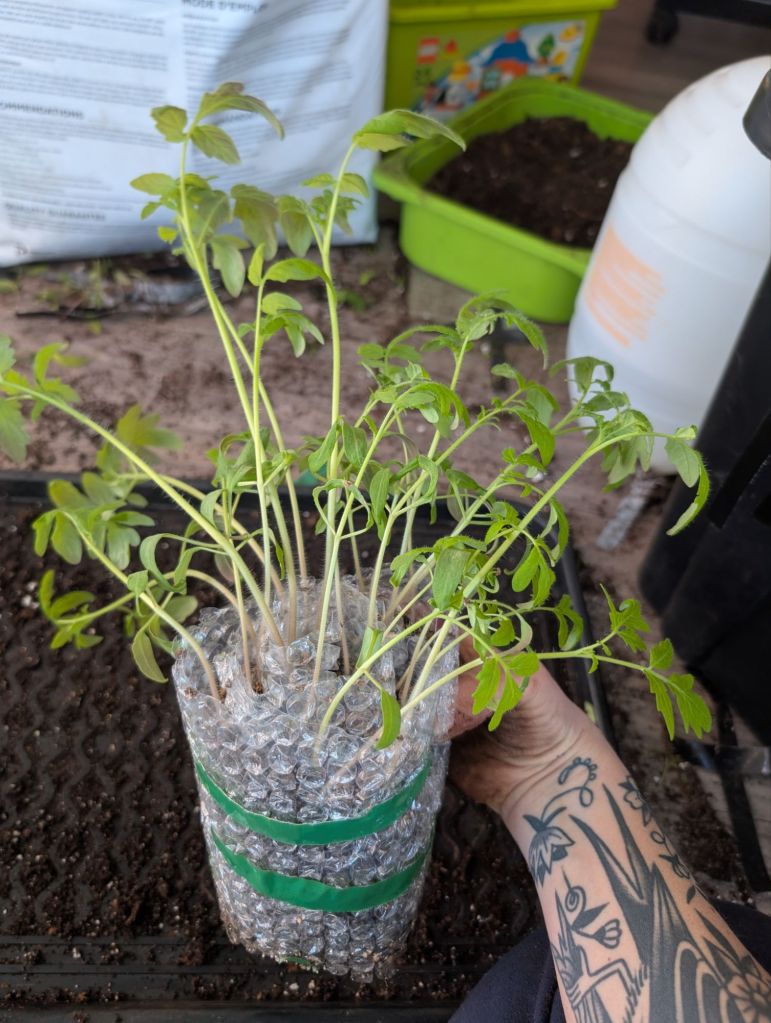
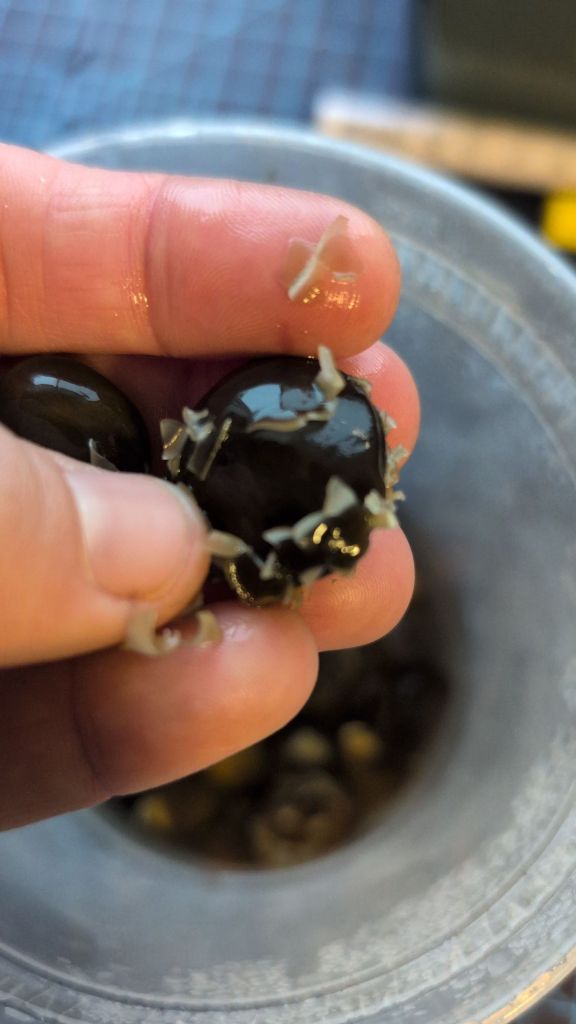
Oops. I ignored my fridge seed experiments too long and accidentally sprouted a bunch of them early. I’m seed-snailing them along with several tree seeds, hoping they won’t need more space than this until I can move them to the greenhouse in March.
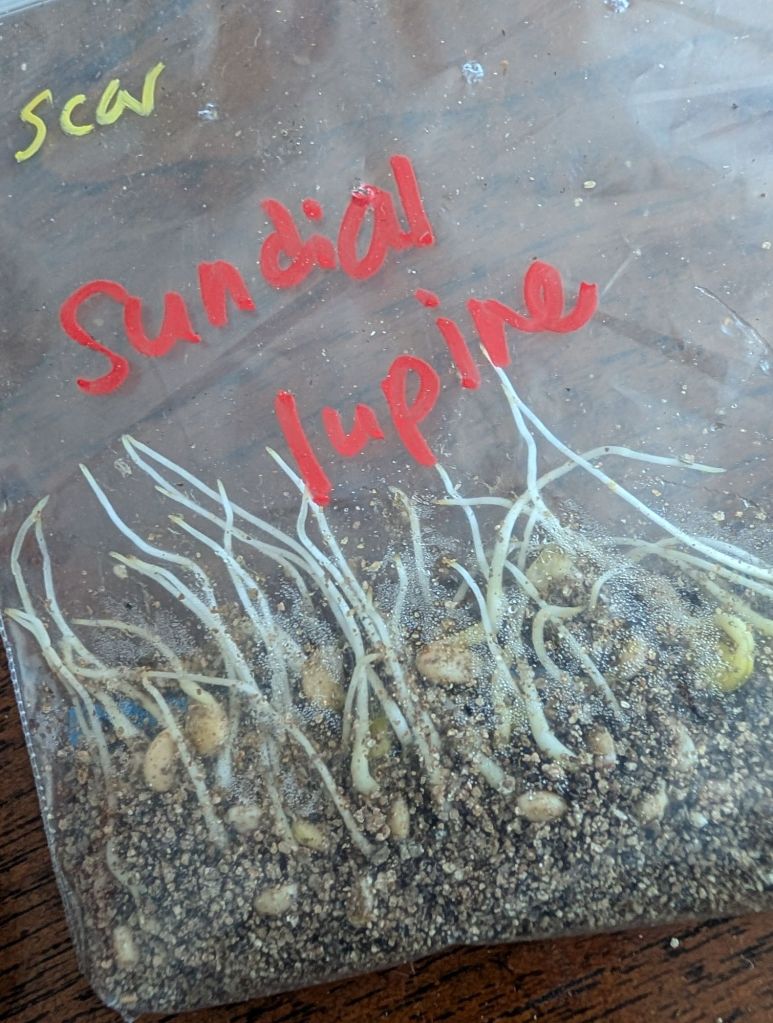
Early risers observed: Sundial Lupine (Lupinus perennis – pictured above), Wild Senna (Senna hebecarpa) and American licorice (Glycyrrhiza lepidota)
I wrote a blog post last year about winter sowing in plastic containers, the easiest cold moist stratification method for a single person growing plants for a single garden and to share with friends or with strangers.
At a far larger scale, however, as I’m attempting to do properly this year, and with gardens planned and needing plants in the spring, this method doesn’t work for all my plants. I have still sown a majority of species this way, and they are happily tucked away, hidden under snow until spring rains reveal them, but I divided my winter sowing efforts this year into a few different methods, curious to see if I can stagger my winter and spring tasks in a more sustainable (to me and my family) manner, but also wanting to experiment, learn, and see if I can improve on some of my past learnings.
As such, my winter sowing efforts this year have been divided into three approaches.
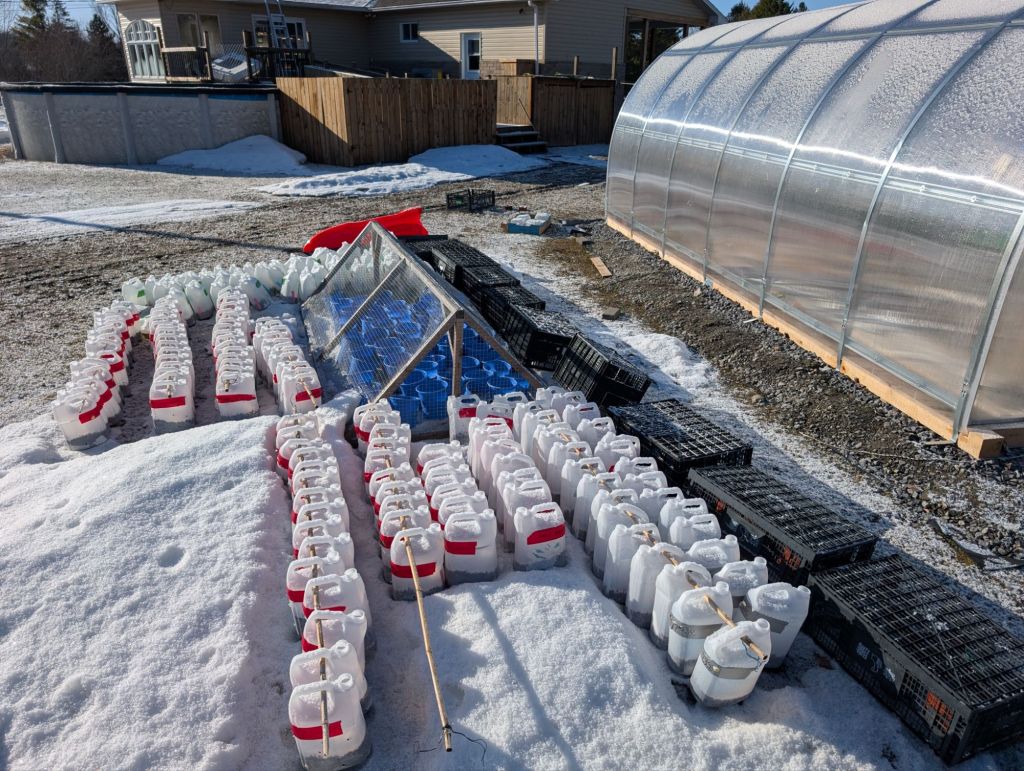
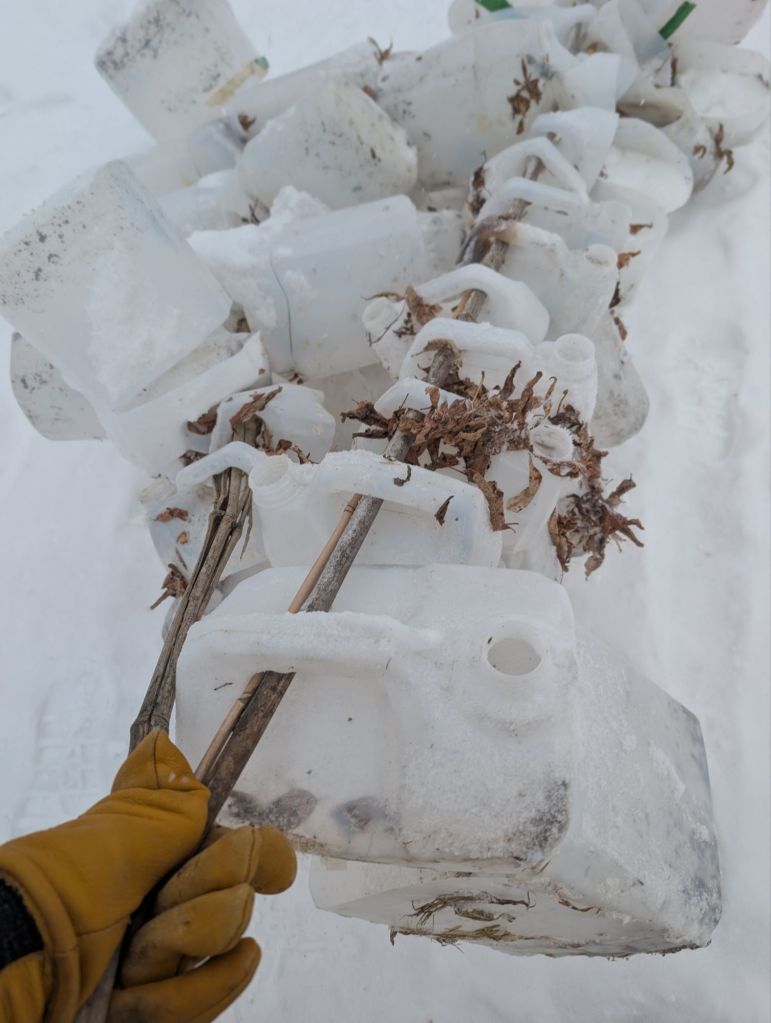
Method 1: ‘The O.G.’ gas station windshield fluid containers
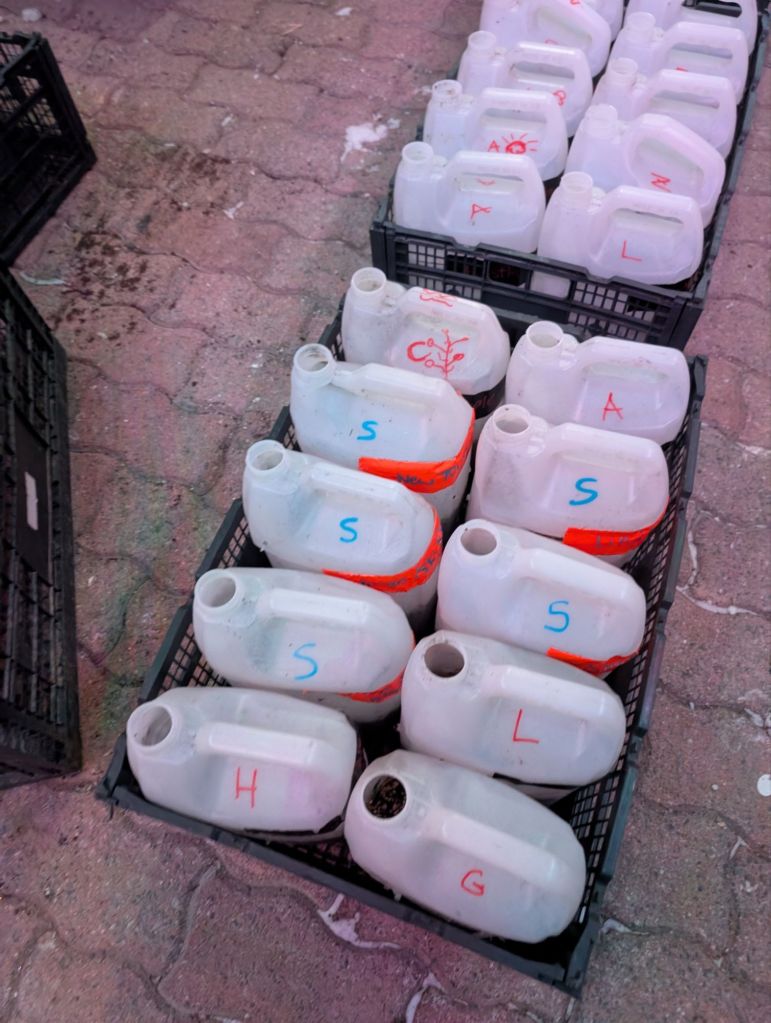
I love that these are the same containers I used last year. They were washed and cleaned in our bathtub before first use, then survived a whole winter outside, and most of them emerged unscathed.

I simply stacked them in piles onto bamboo sticks once I was done with them, saved them in the back shed, and dragged them back across the snow, refilled each one with 4 inches of soil, wet them, sprinkled seeds, and sealed them closed with duck tape.
Method 2: plug trays
Last year I felt very rushed to begin separating and potting up the common and highly desired keystone species I needed earlier in the season (from method 1 into plug trays), so I soaked up the advice and approaches I saw places I admire use ( thank you A Cultivated Art and Cardinal Glenn ), and decided to attempt winter sowing most requested species directly into plugs.
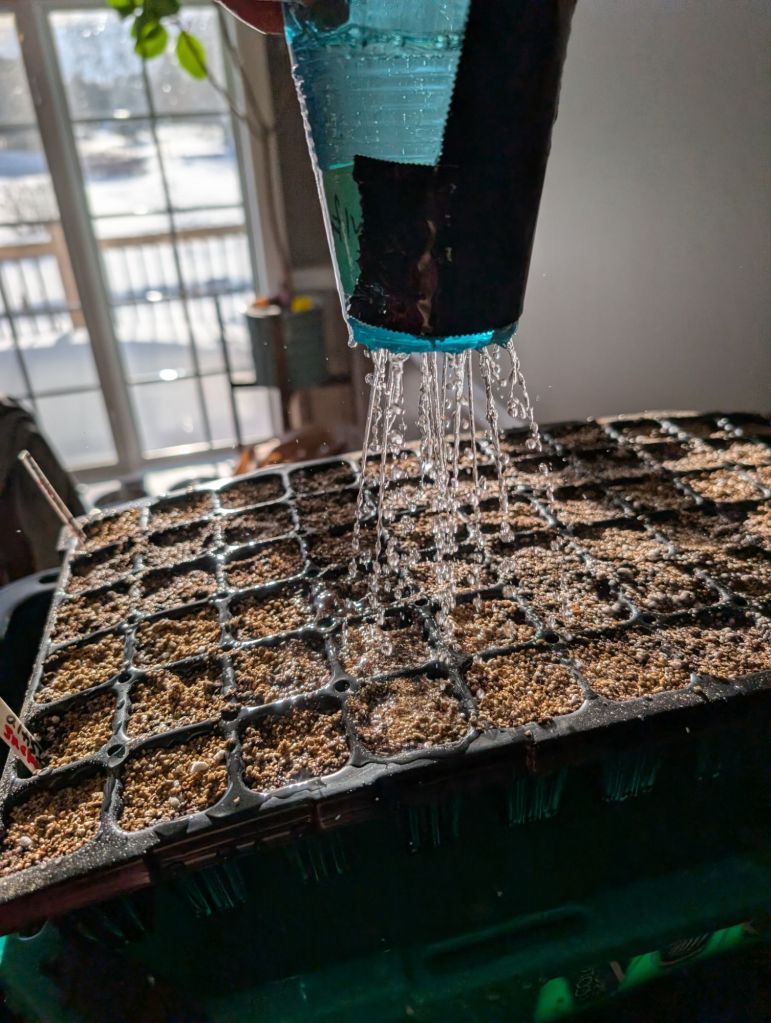
I soaked the soil in the trays with my high tech distributed watering contraption (above), sprinkled some vermiculite on top, along with the seeds, and put the trays outside to freeze.
Once frozen I moved them to a makeshift critter shelter, and covered them all with a milk crate / hardware cloth and brick structure I felt pretty proud of.
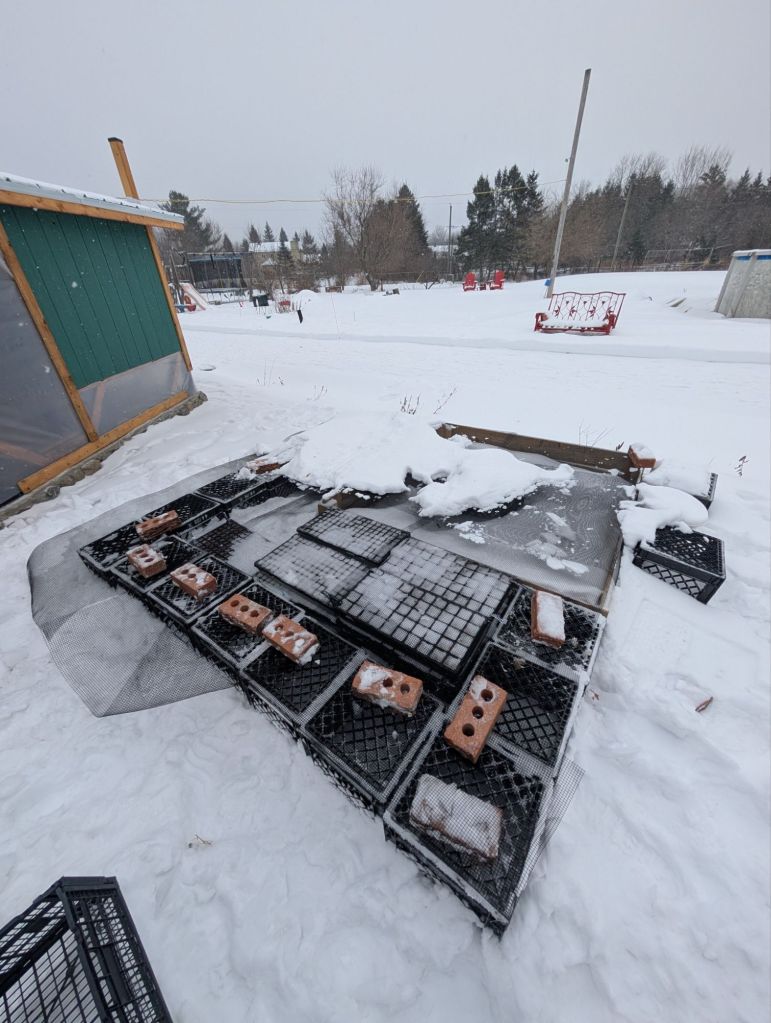
I only later realized I can vertically stack these as well over winter, to save space, and that is what I’ve been doing with my latest batches. This is as far as I’ve gotten so far.
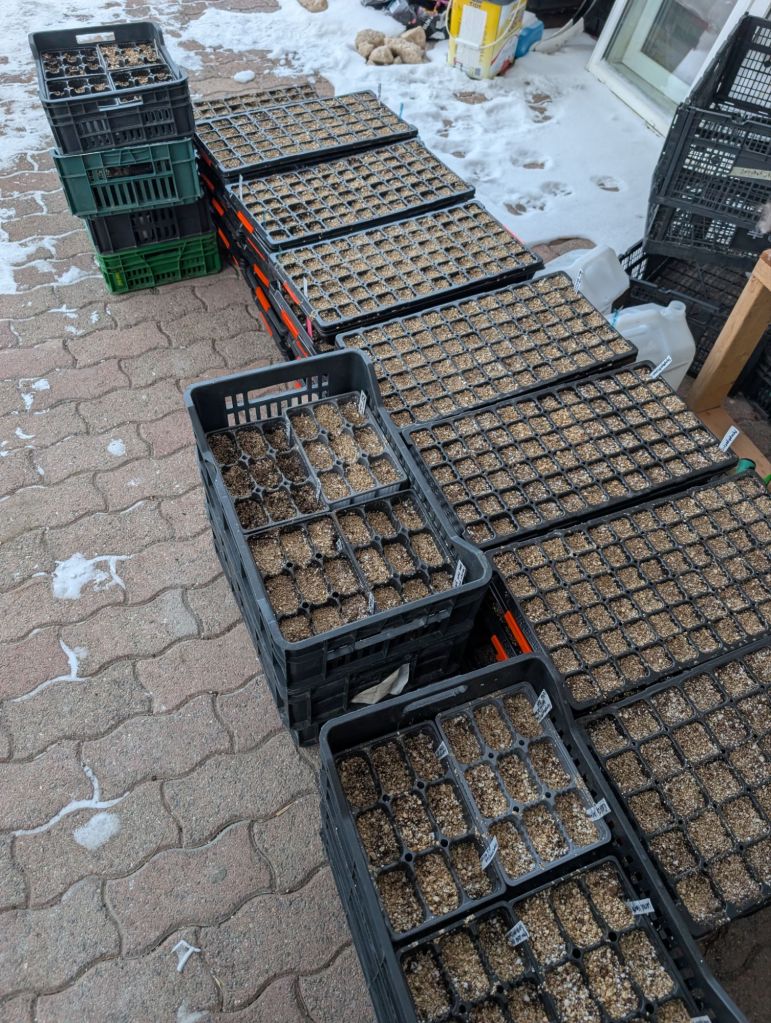
There are a lot of trays under our porch now, and I have yet to find a place to put them, as the original contraption I created that WOULD have room to stack them in is now completely covered by snow.
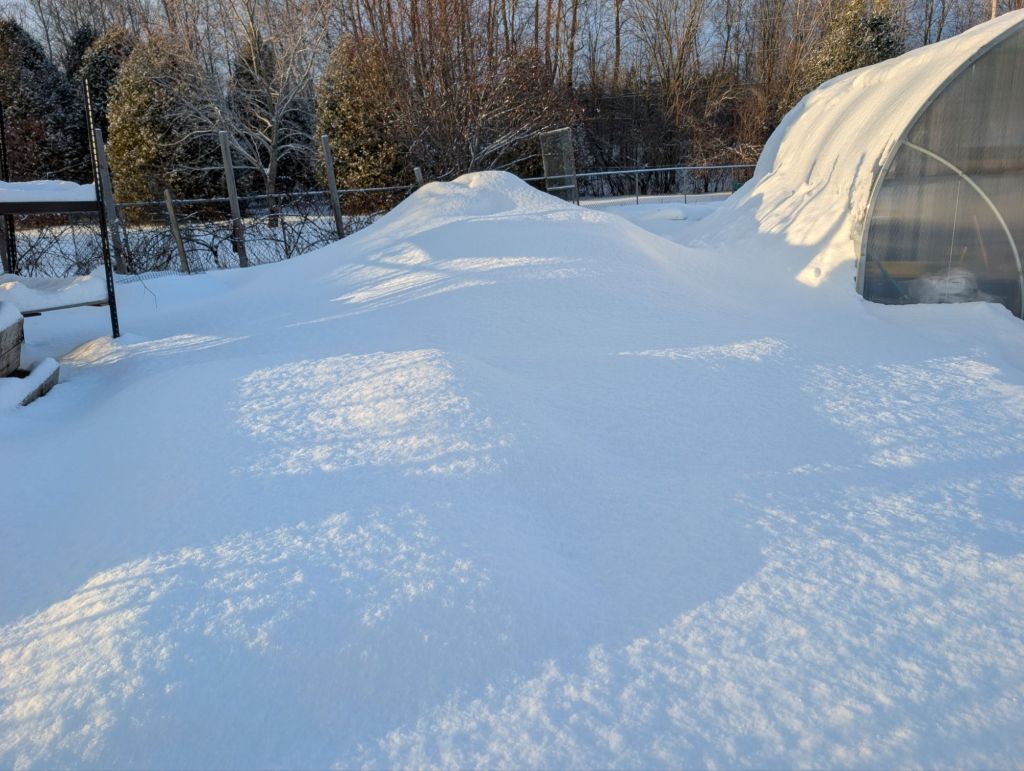
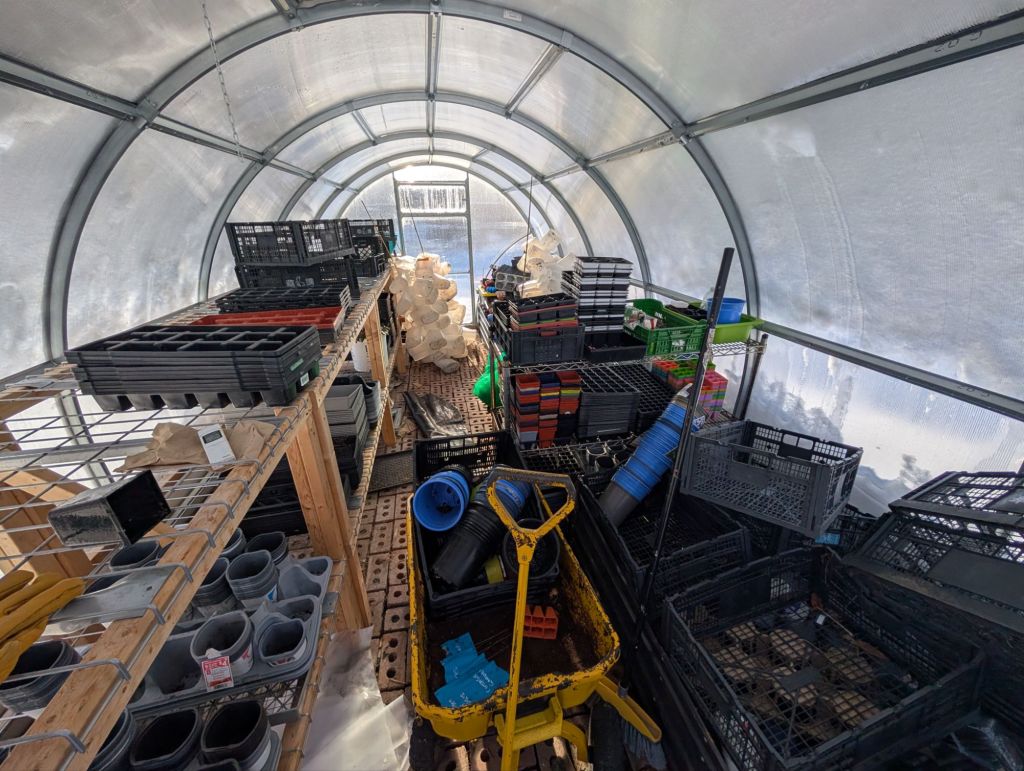
We are expecting another 10-15 cms tonight, and I don’t want to lose these trays completely. I am planning to keep them stacked for now, and in mid-March begin moving them inside my greenhouse, and see if I can get them sprouting a bit early, and have them grow into themselves a bit by the start of our planting season.
Method 3: Fridge Stratification
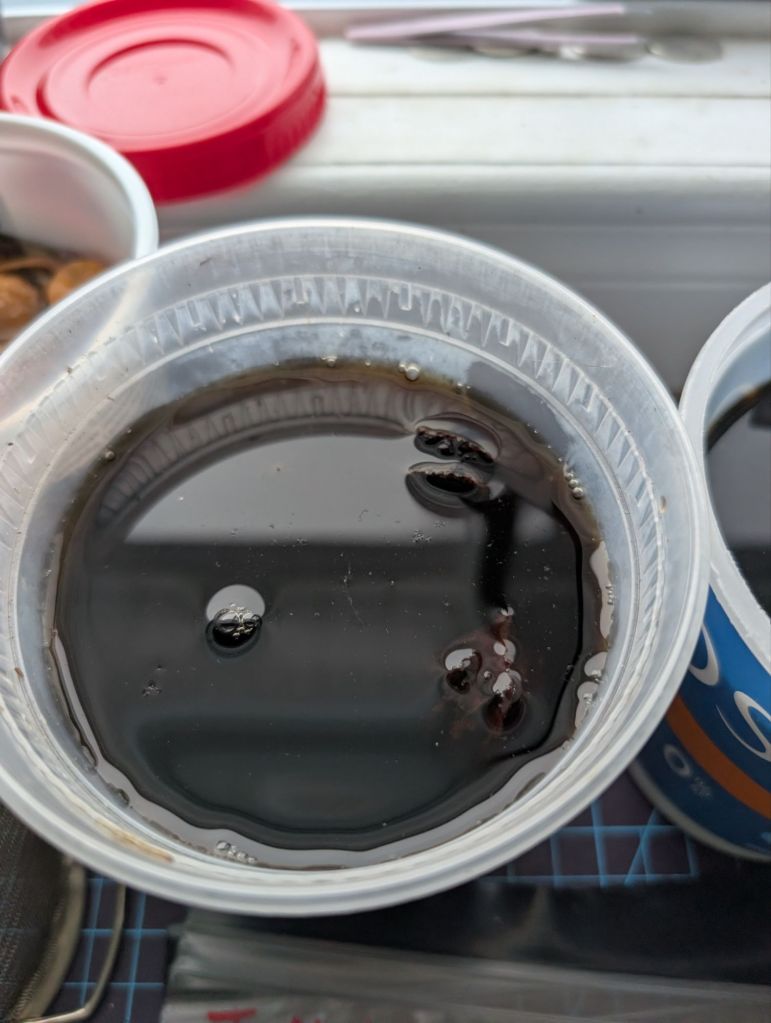
I’m tried CMS (cold moist stratification) in the fridge before, but with far more limited scope than this year. In the past, I’ve used it mostly to mimic double dormancy, or to stratify seeds out of season, or really just as experiments here and there. The reason has mostly been that my family strictly opposes me talking up precious fridge space for my seeds.
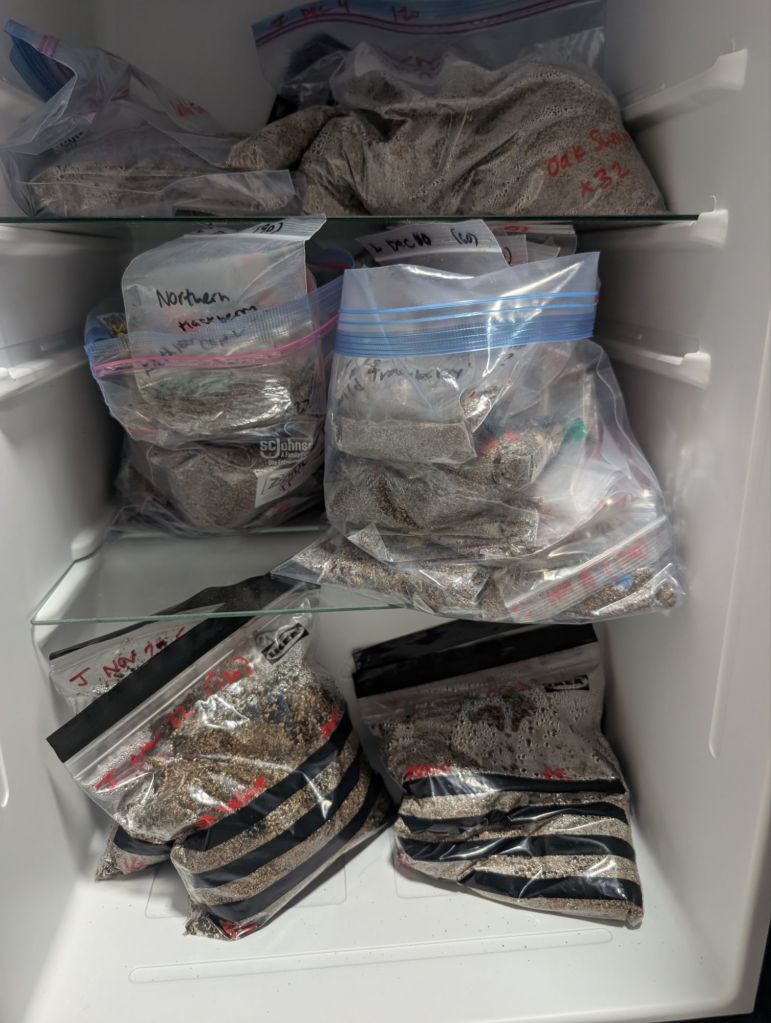
This year I splurged on my very own Mom Seed Fridge. It’s a mini fridge and it’s been banished to the basement, which the teens were excited for, thinking they can use it for pop and bottles of Ice, Prime or whatever random ‘thirst quenching’ gimmick is recently trending on tic tok and a must try of the month. I was struggling to articulate why they can’t use my very own Mom Seed Fridge for those purposes, but it turns out placing the fridge in the furnace room right next to the cat litter boxes did the trick. My biggest problem now is remembering to check on the fridge seeds at reasonable intervals. Not something I have to worry about when I cold stratify seeds outside. But each have their perks.
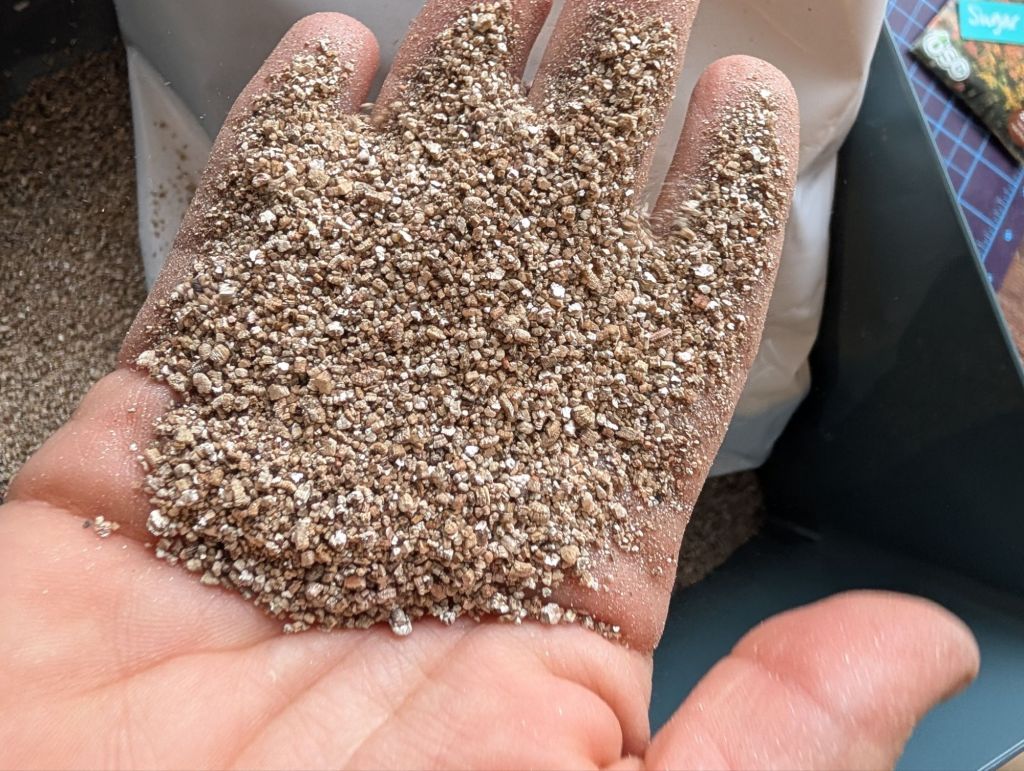
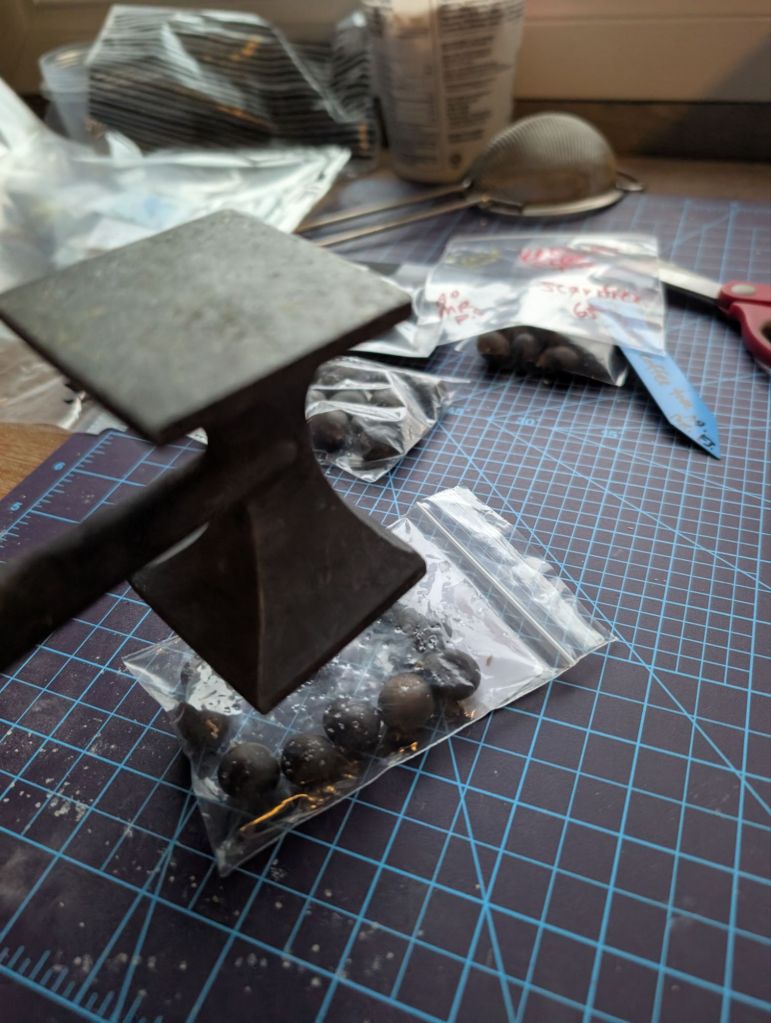
Fridge stratification requires no soil upfront, and very little growing medium. I bought one bag of vermiculite which lasted me me for the 100+ species I packed in little bags to store in the fridge. The soil saving is a bit of an illusion, as taking them out of the fridge and potting them up requires the soil, just at a later time.
The fridge seeds also have staggered end times, so I can process them in smaller batches, and they should be sprouted and potted up into plugs in early spring, while most of my other trays and containers are still buried under snow.
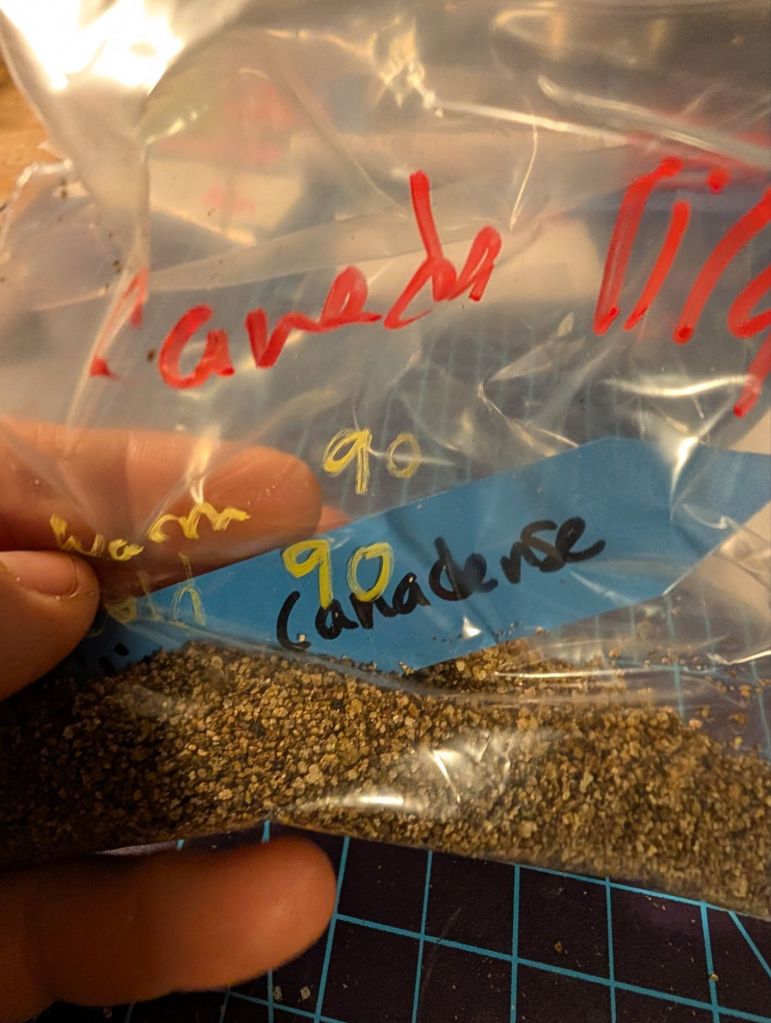
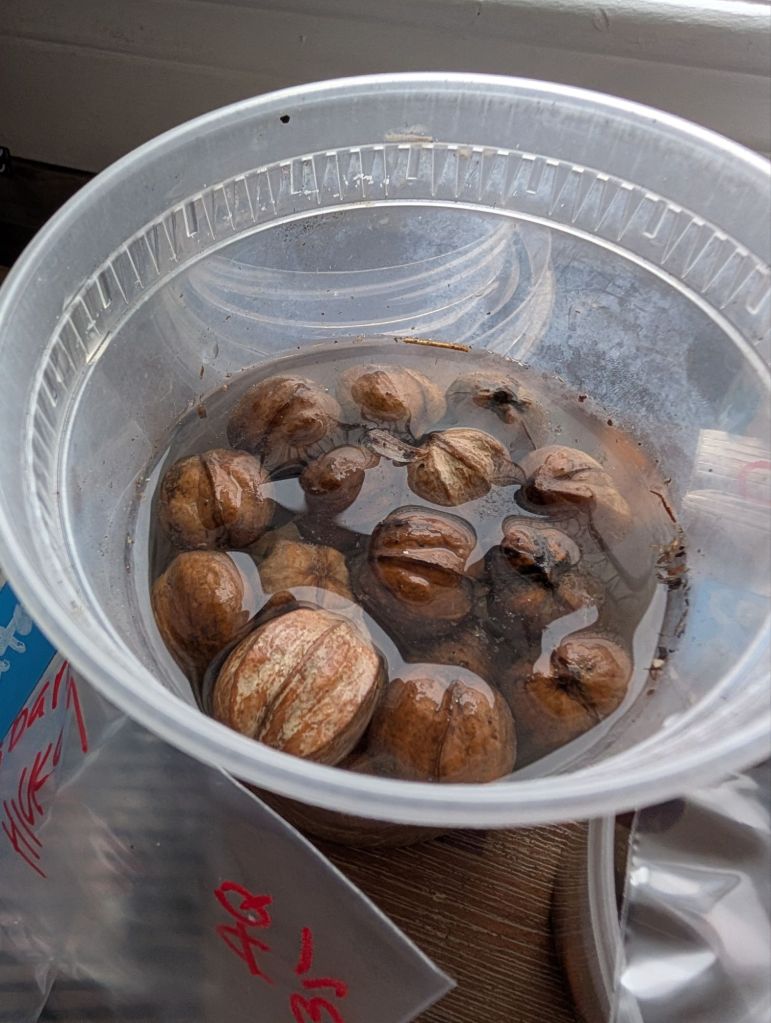
Tree Seeds in the Mom Seed Fridge
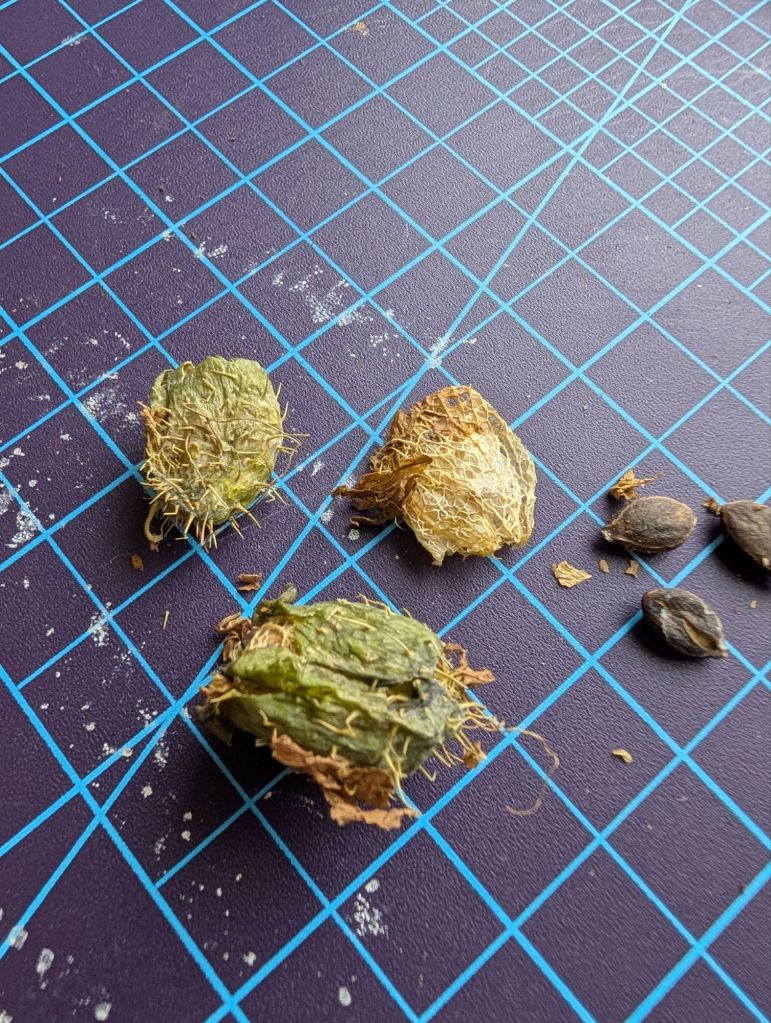
Creating our Tiny Forests this year largely depleted our stock of tree seedlings, which I feel I have increasingly become better at growing and overwintering from seed over the past few years. I planted over 100 native trees in that forest, as well as close to the same amount of fruit and nut trees on the other side of our property, which I am turning into something loosely resembling a mix of a food forest / orchard / seed orchard.
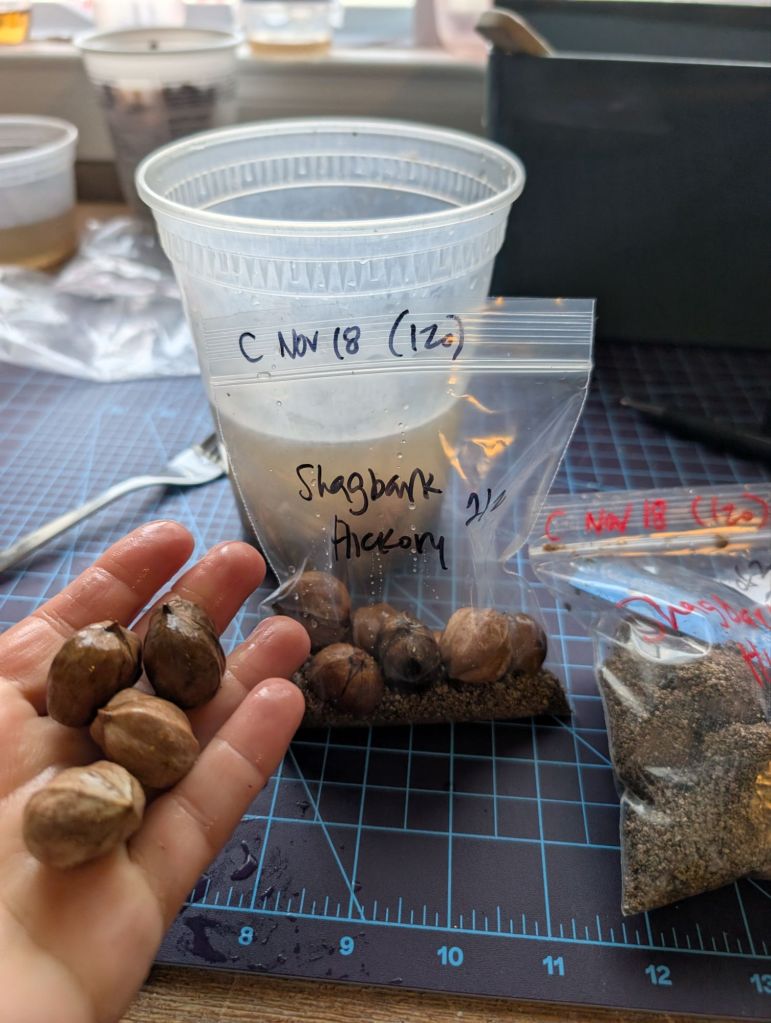
Most of those trees I grew from seed as well, and I want to continue growing more tree seedlings, and expanding our ability to create more tiny forests through community projects, school yard plantings, and canopy enlargement strategies.
We have committed to multiple tiny forest projects beginning in the 2026 planting season (funding dependent), and those require a lot of young native trees. I love growing trees from seed most of all, and this is what I want to focus on growing over the next few seasons, from seed. The best way for me to break dormancy of tree seeds is through fridge stratification.
This was my justification for the Mom Seed Fridge. There are a LOT of tree seeds in there, organized by expected date their CMS is finished. I’ve just finished processing most of the mid January fridge seeds, and in that context, the 3 early risers mentioned above, which started this blog post, were really in small minority. They do show me I need to remember to keep a closer eye on the fridge seeds, something which I hope to have time to do once I finish my winter sowing (which I am getting close to).
About these viral seed snails (my mixed feelings)
I tried seed snails last year, with mixed success, for my overly-ambitious attempt at growing close to 40 varieties of heirloom tomatoes. I never quite got around to reflecting on where that went wrong (beyond the obvious).
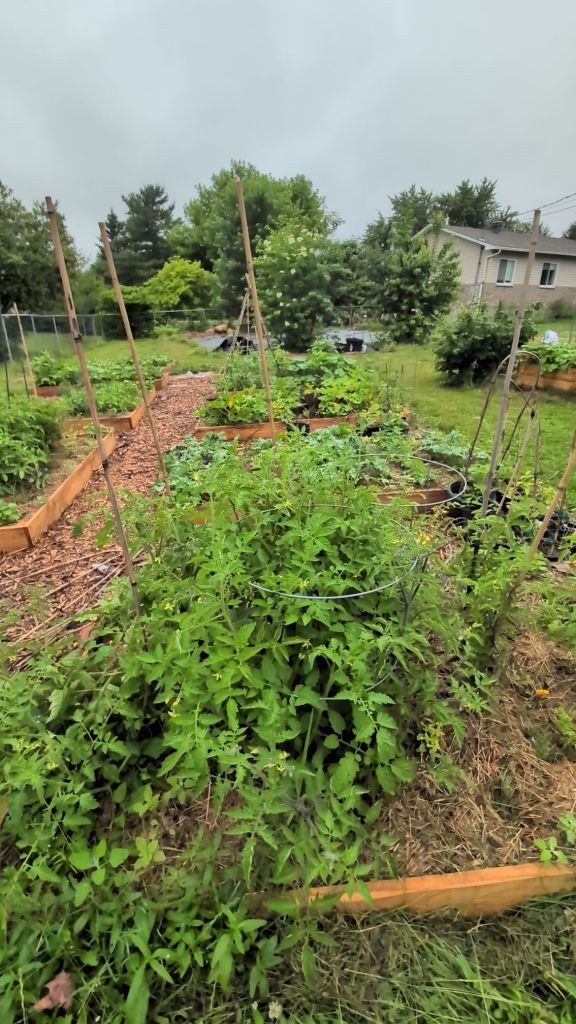
2025 Tomato Growout saga – mini reflection: The short version is that I grew far too many plants, gave most of them away to the lovely Cole over at the Good Shit for their Good Garden project, and the rest I actually planted one plant of each variety in our new vegetable garden beds.
I lost the tags (and many tags rubbed away from the elements) and I was left with no idea which are which.
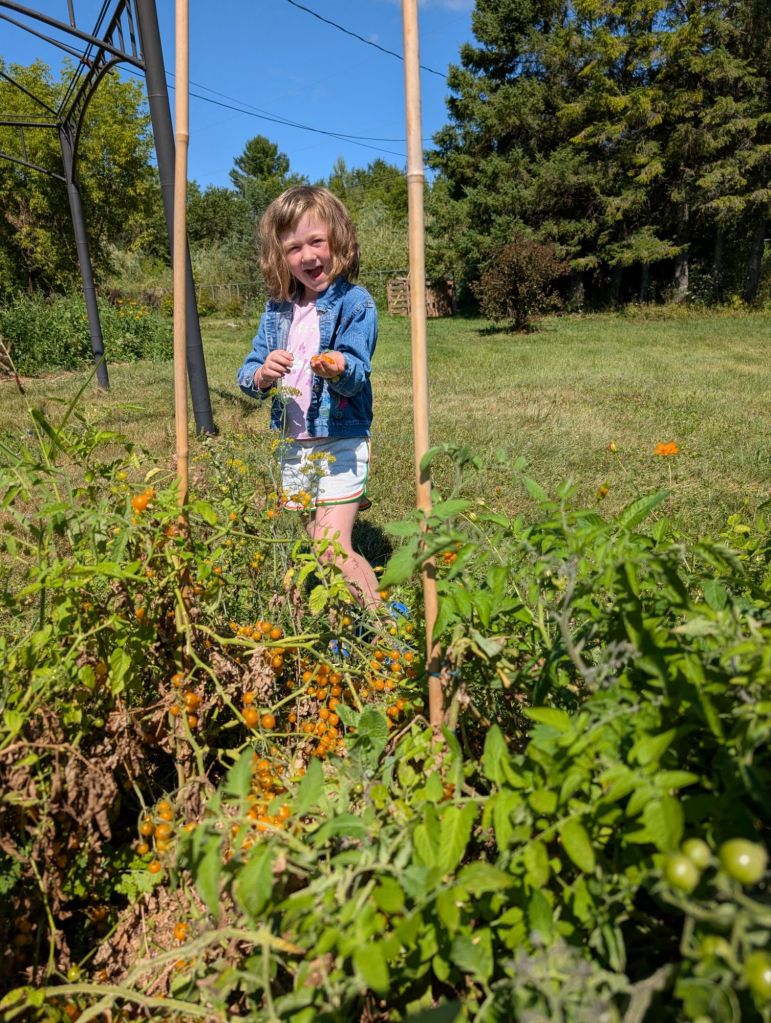
I also forgot to keep stalking them after the initial planting, so most just slithered against the ground for the season, but did produce, though likely not to their full capacity. Here is R with her favourite floppy variety, henceforth known as ‘Floppy’s Favourite Carrot Tomatoes’ (though I’m pretty sure these ones are actually Gold Nugget.
I was also surprised to find that of all the types we grew, a lot of the varieties we simply didn’t love. I had been very excited to try growing white or near white low-acid tomatoes, but many of them either spoiled too quickly, or simply didn’t have a lot of taste. Many of the dark purple and ‘chocolate’ cherry and grape varieties never actually seemed to ripen, and of the many many beefsteak tomatoes we had, most fed far more wildlife than humans, as by the time we got around to picking them they had been devoured.
We eventually learned to pick many off the vine while they were still green, and let them take their time ripening inside, and once they finally did we started to recognize our favourites.
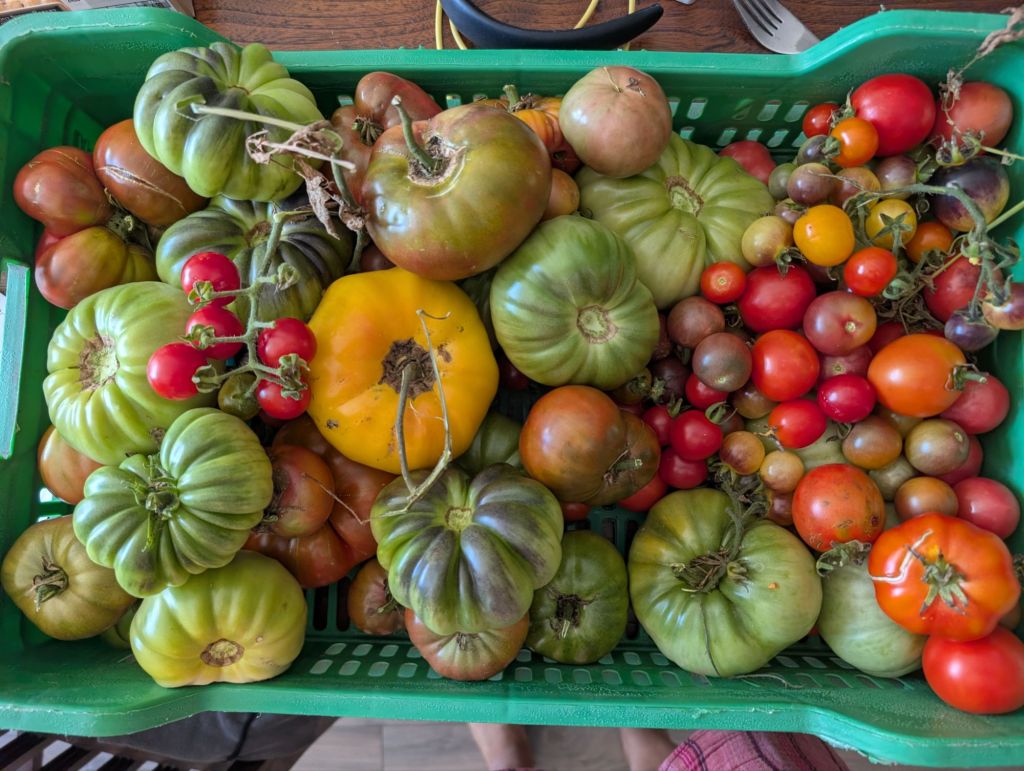
I saved the seeds of the varieties we did love, and I will grow those again this year, likely unable to identify their heirloom names, so we will just enjoy them as our family favorites, such as ‘Floppy’s Favourite Carrot Tomatoes’. The only variety I can recall the name of offhand is Black Krim. So so good.
Now back to the seed snails.
Root observations
I don’t like that the roots can’t really breathe in there. I can appreciate the ease of separating seedlings and roots, but I also found that even outside of vegetables, the plants grown in this manner had far lankier, less bushy and less robust root systems.
Space saving in seedling trays
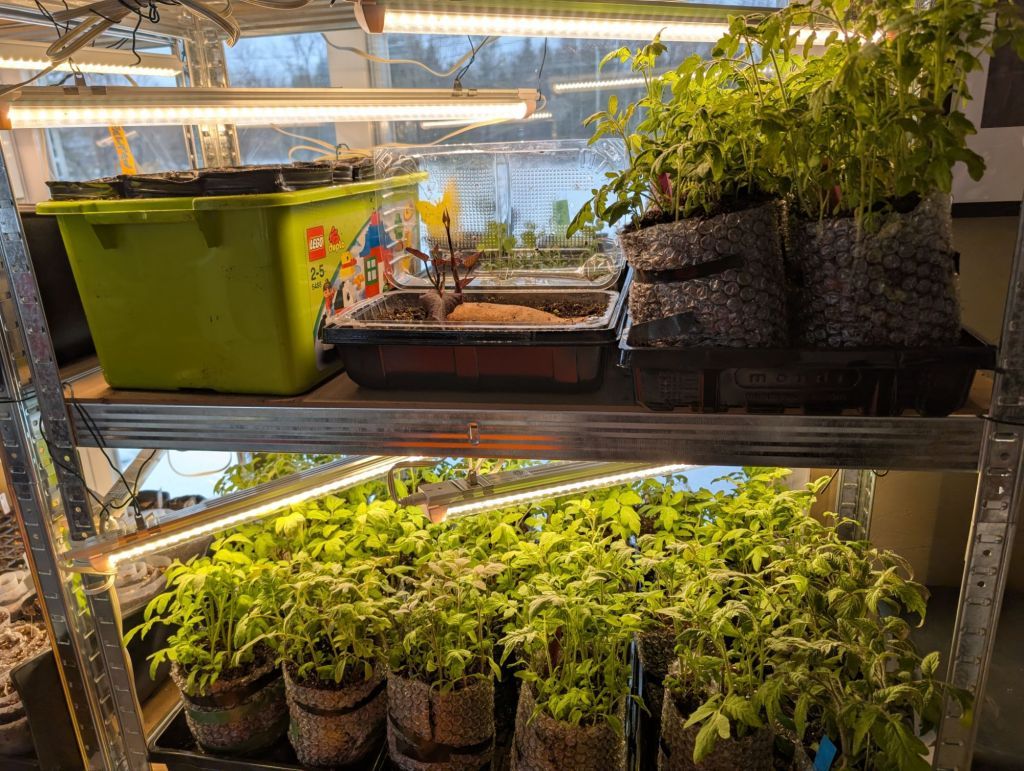
I’m using snails for a specific purpose this year, with a very short lived goal of sprouting fridge stratified tree and shrub seeds in a condensed indoor space. In this manner, I can fit somewhere around 14-18 species per tray, 4 trays per shelf, 4 shelves of grow lights and heat mats per unit. In theory that could let me sprout over 200 species on a single unit, but making snails is time intensive, and I am keeping them to a minimum this year (last year was intense).
Sidebar 2 – some renos happening here
We are also starting a bit of a slow paced renovation of my beloved sun-room, with a goal of lifting the sinking back corner (check ✅), opening up the ceiling to expose the roof beams (also check ✅ but they turned out to be far uglier than we expected, so really new work in progress now), and insulating the floor (check ✅), roof, walls, and moving a wood burning fire place in here.
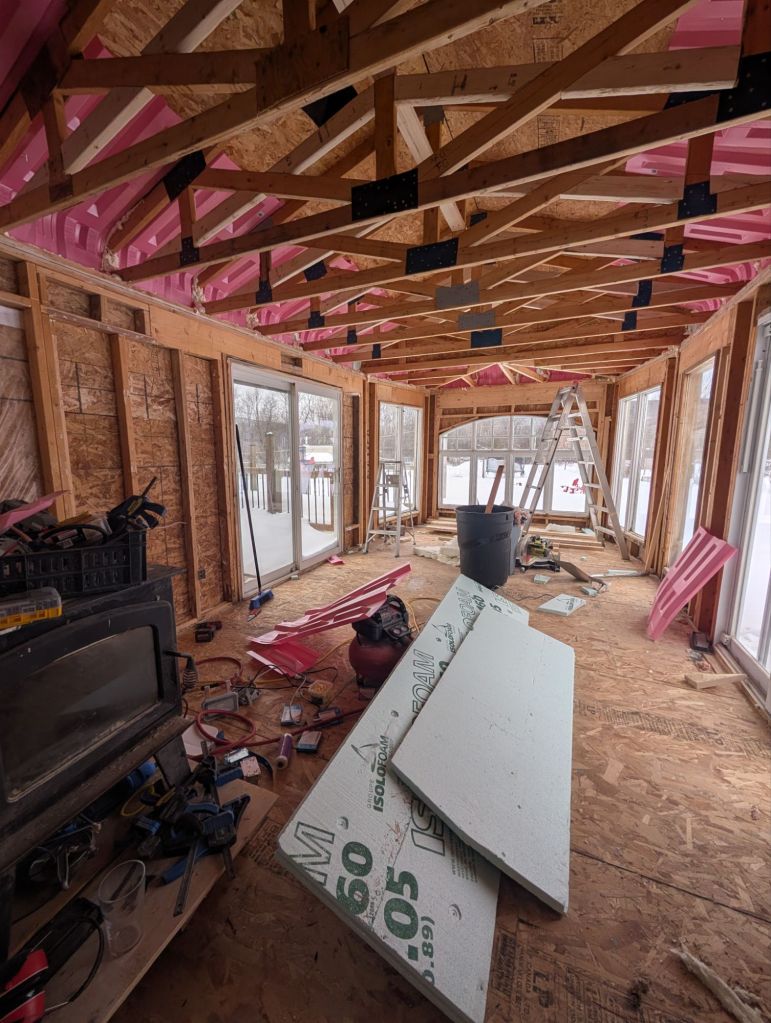
Along the way we uncovered the old windows are rotten so we need new-old windows, and everything is taking far longer than we (me actually) expected. The nose-hair-icicle-inducing temperatures don’t help things move along either, and I find myself in prime garden seedling starting season with no sun room, and no space to assemble and put my seedling shelf units except in the middle of our living room, where our new kitten Linden eyes them longingly.

…Back to seed snails
So, starved for space, I’m giving seed snails a second chance this year with a very short life span, until either the sun room is finished (hahaha), or I can move my seedlings to the greenhouse sometime (hopefully) in early March.
A few of my takeaways from seed snails last year, based on my own experience. I don’t profess myself an expert at this lengths, and I’m sure there are many ways others have used it better.
My seed email takeaways from 2025
1. Old cloth / rag strips instead of plastic – nope. The roots grow into the fabric and they get damaged when you try to pull them out. I didn’t think to try reusable shopping bags last year though. I might give those a try this year if I run out of material, or maybe chicken feed bags.
2. Newspaper instead of plastic – also nope. The paper began disintegrating and moulding
3. Shorter strips are better – I made really long strips last year, and found the seedlings that were happiest were closest to the centre, within the first two rings. Everything on the outer perimeter related to get the leggiest or bend far easier. So this year, I shortened the strips I’m using to about 1/2 of what they were.
4. Bottom watering is too much for seed snails – because the plastic walls essentially prevent aeration of the soil, it really doesn’t ever dry out completely or enough to warrant bottom watering. It WILL absorb water, and hold it, but just because it can use doesn’t mean it needs it. If you start with a pre-moistened, porous soil mix, that moisture will likely be retained far longer than a regular pot, and your seedlings should be happy with light intermittent misting.
5. Soft slightly stretchy plastic is better than very rigid plastic. Soil bags are the perfect consistency. Based on my experience of today, empty dog food bag is not the right consistency
6. If the roots have grown to the bottom of the seed snail, I would transplant into individual pots, rather than adding soil and wrapping the snail back up again. This is the point where, in my experience, the roots will weaken with no incentive or room to spread laterally.
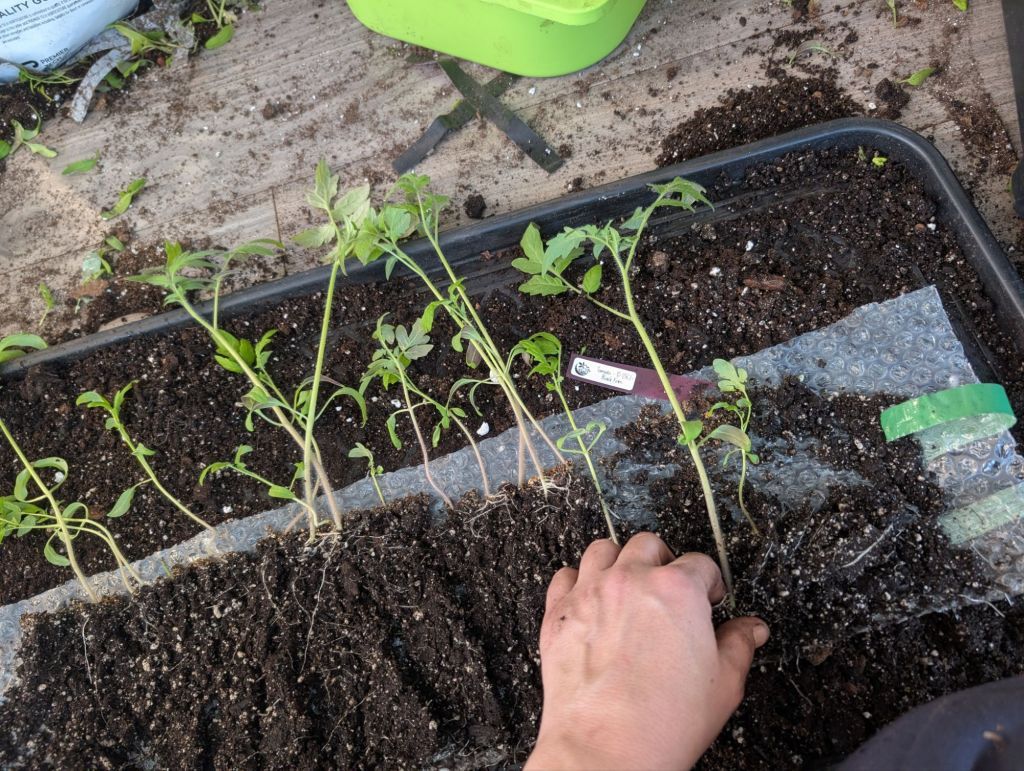
7. When the seeds start sprouting, seed snails are sooooo pretty.
These were some baby American Bellflower sprouts last year.
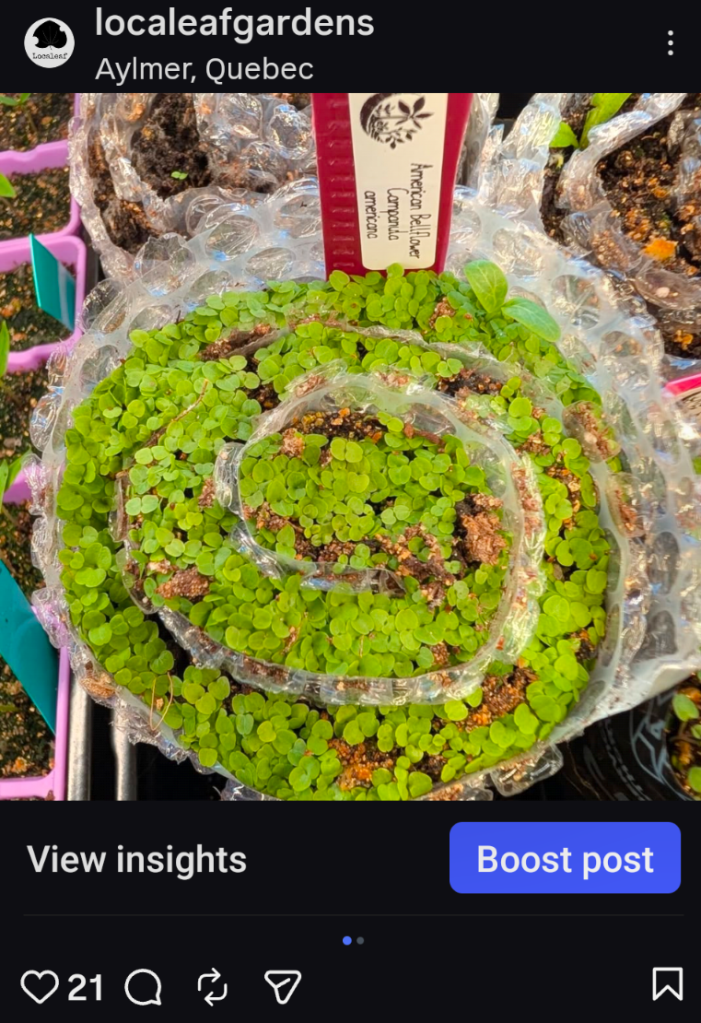
If you’re into the Instagram photos, seize the opportunity early. Seed snails are most impressive in their youngest just turned green phase. After that they tend to get a bit lanky. Something more along the lines of this:
8. They are soooo fun to make with kids. My 5 year old loved helping me to roll them last year, and I loved making them with her. I’m hoping she is willing to make some more with me this year.
In summary, seed snails have merit, in my opinion, door early selling starts. I am planning to remove sprouts from them as early as I can find them alternate accommodation this year though.
I’m not sure how I ended up writing this much based on a couple of eager and early sprouting seeds, but here we are.
My break from Instagram
This year I realized that Instagram was putting a lot of imagined pressure on me, and it felt awful, so I am taking a break from it, especially during this high pressure time that is invisible to most. Winter sowing is a relaxing and dreamy activity at an individual level; a way to connect with nature, plan and dream about next season’s garden, and get hands and nails covered in dirt in the middle of winter. The typical window for doing this symbolically begins on the winter solstice, and typically wraps up by the middle of January.
Realistically, as a mom first, I don’t touch dirt until after New Year’s, and don’t manage any sowing activities at scale until after the kids are back at school from winter break. During the holidays this year, I felt a longing pull everytime I walked by my loosely organized bags of seeds, each patiently waiting for their turn to be soaked, scarified, filed, covered in boiling water, or whatever each species requires to mimick ideal conditions for germination.

I couldn’t wait to process each packet, and yet I knew I had to wait. Although the logical side of my brain knew that my window for tackling these seeds is actually quite flexible, Instagram chipped away at that logic, and an inexplicable sense of dread began seeping in its place everytime I logged on to the platform (which I really don’t do often. I’m the pre-millenial generation of Facebook, which remains my scrolling drug of choice).
On Instagram, I was being sequentially bombarded by images of containers filled with seeds, sealed and placed out in the snow. Yes, the logical part of my brain knew I have lots of time to get around to my seed reservoirs, but knowing how many seeds I still needed to process, in comparison to these images of everyone who is already done, created an artificial sense of anxiety, of feeling inadequate and inferior to people with fully functioning brains and nervous systems, people I have no need or desire to compare myself to, many of whom I admire and have great respect for.
To combat that feeling, I decided to reset my Instagram, and consciously remind myself to remain focused on my own life, my limitations, my achievements, and most importantly, the moments that give me joy in a given day, and remind me of what’s important.

If you follow my Instagram and see my 100 day postings, and they don’t make sense, they don’t need to. The photos you see are there for me, not an external audience.
Discover more from LocaLeaf
Subscribe to get the latest posts sent to your email.

The Linden pic!! ❤️❤️
Sent from Gmail Mobile
LikeLiked by 1 person
Hi LocalLeaf,
Just a quick note to let you know how much I enjoyed reading your blog above. Your humour shone through and I was very impressed with your tree seedlings. I have a White Pine grown from seedling that is in an outdoor container, doing very well. I know nothing about collecting seeds from it and got it from Ecology Ottawa a few years ago. It’s so beautiful and I don’t know how I will ever transplant it!
Good luck on all your hard work and sunroom renovation.
Cheers,
Maren Oddie
LikeLike
awww thanks so much, for actually reading it, and for your comments. that means a lot. I’m trying to grow out 3 local types of pine from seed this year too, and it’s my first time. If they sprout im happy to share a little baby with you.
Then you can plant your pine, it wants to spread its roots more permanently soooo badly I bet 🙂
LikeLike